
Seed tray heaters can be a great tool for gardeners who want to get a head start on their seedlings. These heaters provide a consistent source of warmth that can help to promote seed germination and encourage healthy growth. In this blog post, we'll explore how to use seed tray heaters to germinate seeds successfully.
Step 1: Choose the Right Seed Tray Heater
Before you can start germinating your seeds, you need to choose the right seed tray heater for your needs. Seed tray heaters come in a range of sizes and styles, so it's important to choose one that's appropriate for the size of your seed trays and the number of seeds you want to germinate.
Some seed tray heaters are designed to fit under a single seed tray, while others can accommodate multiple trays at once. You should also consider the wattage of the heater, as higher wattage heaters will provide more heat, but may also use more electricity.
Step 2: Prepare Your Seed Trays
Once you've chosen your seed tray heater, it's time to prepare your seed trays. Start by filling each tray with a suitable germination mix or seed-starting soil. Make sure the soil is moist but not waterlogged, as too much water can lead to rot and other issues.
Next, plant your seeds according to the instructions on the seed packet. Depending on the type of seed you're planting, you may need to plant it at a specific depth or spacing. Cover the seeds with a thin layer of soil, and gently water them in.
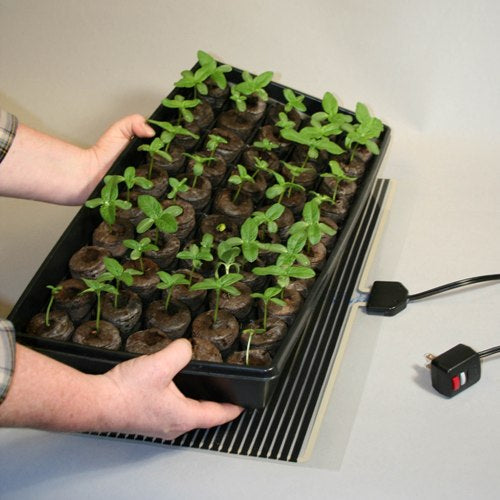
Step 3: Place the Seed Tray Heater Under Your Seed Trays
Once your seeds are planted, it's time to place the seed tray heater under your trays. Make sure the heater is plugged in and turned on, and position it so that it's providing heat to the bottom of your trays. If you're using a multi-tray heater, make sure all of your trays are in contact with the heat source.
Step 4: Monitor the Temperature
As your seeds germinate and begin to grow, it's important to monitor the temperature of your seed trays. Many seed tray heaters come with a built-in thermostat that allows you to control the temperature, while others use a standalone thermostat to monitor several seed tray heaters at once. Make sure you refer to your seed packet for optimal soil temperatures for the seeds you're growing.
You should also check the temperature of your soil regularly with a thermometer, as the temperature at the surface of the soil can be quite different from the temperature at the bottom of the tray.
Remember to maintain appropriate moisture levels in your soil mix to achieve germination.
Step 5: Remove the Seed Tray Heater Once Germination is Complete
Once your seeds have germinated and started to grow, you can remove the seed tray heater. At this point, your seedlings should be strong enough to thrive without the extra warmth.
In conclusion, using a seed tray heater can be an effective way to germinate seeds and get a head start on your gardening season. By following these simple steps, you can use a seed tray heater to create the ideal environment for your seeds to germinate and grow into healthy, strong plants.